
The quick answer
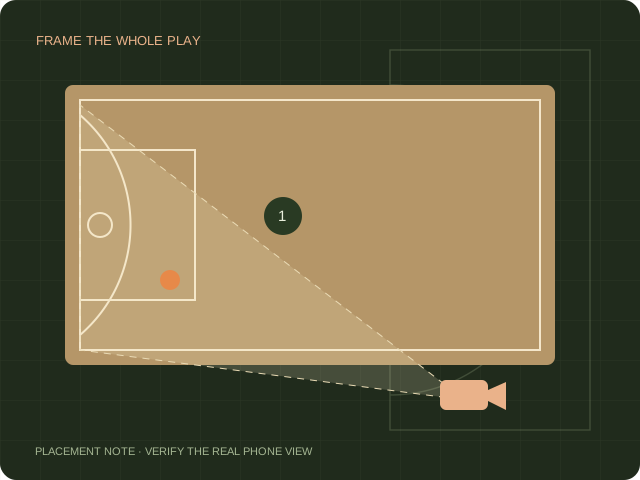
HomeCourt’s setup guidance recommends a stable elevated device near the sideline around half court, with the player, backboard and three-point line visible. Use that as a starting point, then verify the view on your actual court. A placement diagram cannot predict your phone’s field of view.
Use the documented position as a starting point
HomeCourt’s published setup article suggests a tripod or stand around 3–5 feet high along the sideline near half court. It asks for a view of the player, backboard and full three-point line. Start there if your venue permits it, then check the actual phone preview from each planned shooting spot. The same physical position can frame differently on another phone or court.
Check the venue before the screen
Choose a position that does not obstruct players, spectators or an exit. Keep the support stable and outside the active playing area. Before adjusting the app, look at lighting, obstructions and whether another basket or moving group enters the intended view. These are observations you can record and repeat; they are not a guarantee of recognition accuracy.
Test the edges of the planned activity
Ask the shooter to stand at the nearest and farthest positions they will use. Watch the phone preview as they move. A frame that works for a stationary free throw may lose the ball or feet during a corner attempt. Leave enough room for the whole action rather than zooming in simply because the basket looks small.
Make a short test before the full workout
Record a few deliberate attempts and replay the saved result. Inspect visibility, the beginning and ending of each shot, and whether the phone moved. Change one setup variable at a time so you know what improved the view. Keep a note of the successful position, support height and recording orientation for the next visit.
Draw the plan, then validate it in person
Use the editable court diagram to place a camera marker and the planned shooting spots. The marker records your intention; it does not simulate lens coverage or certify a safe camera location. Export the diagram for another person helping with the session, then make the on-court check before recording.
Sources & scope.
Prepared by Hoopcut from public documentation, reviewed November 11, 2026. We have not tested these instructions inside a signed-in HomeCourt account. Official documents may describe older app menus; follow the current controls and confirm account-specific details with the provider.
- HomeCourt device setupPublished update September 7, 2022. Guidance, not a recent app test.
Independent guide by Hoopcut. Not affiliated with or endorsed by HomeCourt. HomeCourt account, billing and recovery requests must go to the relevant provider.