Filming basketball
How to Record Basketball Practice Alone: A Repeatable Setup
Set up a solo basketball practice recording with a court-position diagram, a short test routine and a log that separates attempts from selected clips.
 THE HOOPCUT PLAYBOOK
To record basketball practice alone, choose one drill area, set a stable camera outside the movement path, and film a short test before the full set. A solo session benefits from a repeatable frame more than constant camera adjustments. The goal is to see the complete action you want to review. This is a filming workflow, not a claim that Hoopcut measures shooting form or counts every attempt.
A PRACTICAL STARTING POINT
Decide what the recording needs to show
Write one question for the session: can you see the gather and release, the route into a finish, or the footwork before the shot? That question sets the framing.
Put the phone outside the ball and movement path
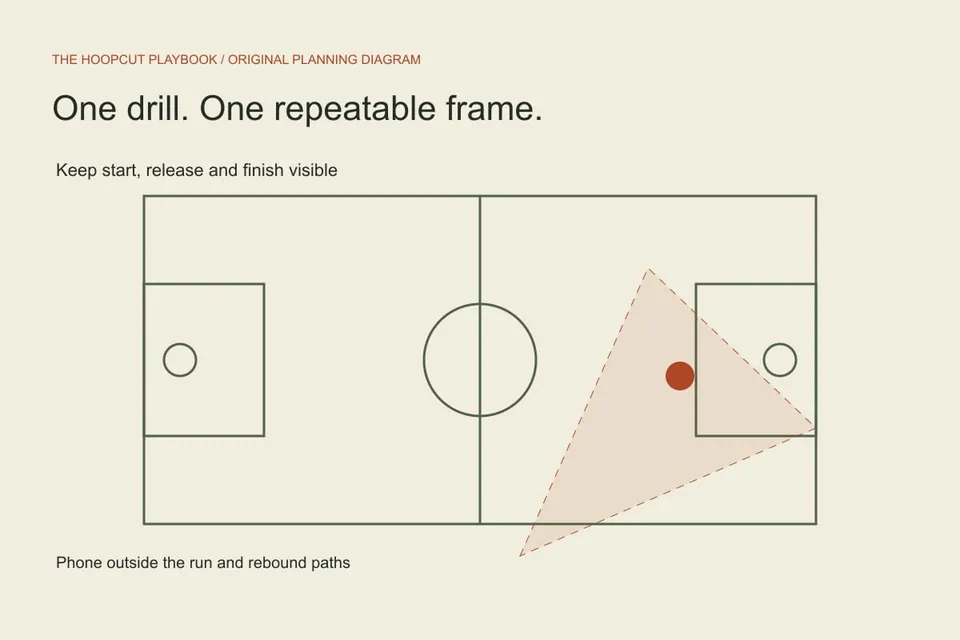
Use a stable permitted support beside the drill area, with the lens aimed at both the start and finish positions.
Film one repetition and walk back to review it
Start recording, perform a single repetition, then replay the saved file.
Decide what the recording needs to show
Write one question for the session: can you see the gather and release, the route into a finish, or the footwork before the shot? That question sets the framing. A close view of hands may omit the feet; a wide view may make details too small. Choose the part you need to inspect and keep the other tradeoffs visible. Avoid changing the purpose halfway through a set. If you need a second angle, make it a separate set with its own label rather than trying to interpret unrelated views as one continuous test.
Put the phone outside the ball and movement path
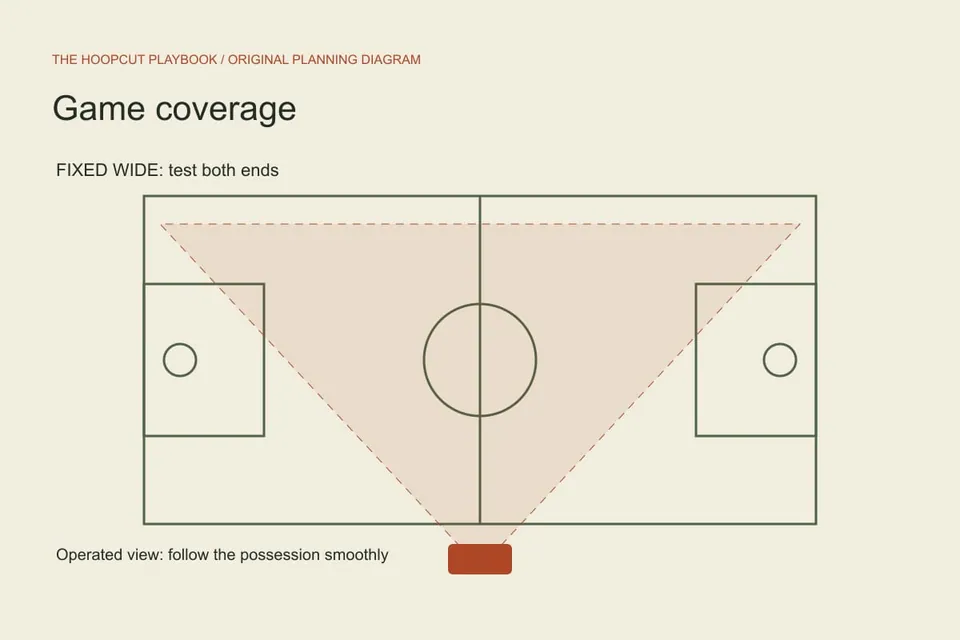
Use a stable permitted support beside the drill area, with the lens aimed at both the start and finish positions. Keep the rebound route and other players in mind. The illustrated layout shows one possible relationship between phone, player and hoop; it is not a distance prescription. Walk the movement once without recording and check where you might step or chase a loose ball. If the camera sits on a shared court, confirm that the position works for others using the space. Move the drill or camera if the frame cannot stay clear.
Film one repetition and walk back to review it
Start recording, perform a single repetition, then replay the saved file. Check that the feet, release and basket stay visible for the question you chose. Make one framing adjustment at a time so you know what changed. A live preview can look usable while the saved image reveals clipped feet or an obscured rim. Apple’s Camera guide explains basic video controls; device options vary. This page does not claim there is one resolution or frame rate that will work for every phone, light and drill.
Record short, labeled sets
Name each set by drill and angle, such as corner-catch-set-01 or left-finish-side-02. Leave a little time before and after a repetition so the setup is visible. If you stop the recording, create a new log row rather than continuing old elapsed timestamps. Do not keep handling the phone between every attempt if that breaks the practice routine. A short block you can review clearly is more useful than a long recording with no notes. Keep the session structure simple enough to repeat next time.
Keep review notes separate from performance claims
A highlight shortlist records selected moments. It is not a complete attempt log and cannot establish shooting percentage. If you want to count attempts, review the complete set and define what qualifies before counting. Use the player review sheet to mark visibility, context and uncertainty. Do not infer an improvement trend from two edited reels filmed from different positions. For technique feedback, bring the original set and your question to a qualified coach rather than treating a visual tracer as a diagnosis.
Use the clip and the effect for different jobs
Auto clipping helps you move from a longer basketball recording to moments worth reviewing. Shot Tracer helps a viewer follow the ball in a selected shot. Neither changes the position of the camera or supplies a hidden angle. Keep an untrimmed source copy and select the clips that answer your original question. Use the highlight storyboard if you also want to share a short practice update. Label that update as selected moments so viewers do not mistake a polished sequence for an uninterrupted record of the session.
Next steps for your basketball footage
ILLUSTRATED WALKTHROUGH · 9 SECONDS
See the planning approach
Read the walkthrough transcript
- Decide what the recording needs to show
- Put the phone outside the ball and movement path
- Film one repetition and walk back to review it
Before you begin
- Choose one review question and one drill area.
- Keep the phone outside the run and rebound paths.
- Replay one complete test repetition.
- Label every set and keep the complete source file.
Match the frame to the question
| Check | What to look for |
|---|---|
| Footwork before a shot | Include the start position, both feet and the release. |
| Route into a finish | Retain the approach and basket rather than only the last step. |
| Shareable practice clip | Keep readable context and describe it as selected footage. |
Practical questions
Can I calculate shooting percentage from a highlight reel?
No. A selection of makes does not contain the complete attempt set. Use a complete, consistently reviewed recording for any counting task.
Does a Shot Tracer analyze my technique?
Treat the demonstrated effect as a way to show the ball path. Do not present it as a coaching diagnosis or a measured shooting assessment.
Sources and further reading
Editorial guide by Hoopcut at SWINK AI INC. Prepared examples and illustrations are labeled. External product information is not a claim of hands-on comparative testing. Send a correction or a workflow question.