
Shot Tracer
How to Add Shot Tracer to Basketball Video: Review the Arc
Add a basketball Shot Tracer effect on iPhone, review the ball trail against the footage and fix common visibility problems. Includes frames from a prepared sample.
To add Shot Tracer to a basketball video, select a complete attempt with a visible ball and rim, apply the basketball trajectory effect in a compatible editor, then compare the trail with the original footage at release, during flight and at the finish. Hoopcut includes Shot Tracer on iPhone. The final check is whether the graphic follows the ball without hiding the play.
Select footage that lets you verify the ball’s path
Keep the full attempt, beginning before the ball leaves the hand and continuing through the immediate result. A fixed view with a visible ball and rim makes the effect easier to inspect. Look for obstruction by players, the backboard or a camera pan. Do not draw a conclusion from an attractive line when the recording does not show the underlying flight. Keep the original file so you can always compare it with the effect version.
Put this into practice: Capture readable footage with the basketball filming guide.
Apply the basketball effect, then inspect three moments
Use Shot Tracer in Hoopcut’s iPhone app and follow the controls in your installed version. Review the start of the trail against the ball at release, the path during flight and the ending near the visible outcome. Pause rather than judging only at full speed. A line attached to a hand, the backboard or a different moving object is a reason to revise the effect or choose a clearer clip. Keep a clean copy alongside the stylized version.
Use the prepared sample to learn what to look for
In the browser Shot Tracer demo, choose Shot 04. The “Set-up,” “Mid-play” and final-position controls jump within that existing clip; they are navigation points, not automatic measurements of release or apex. Use the seek bar and half-speed replay to find the exact part of the ball’s flight. The frames below come from this same prepared reel. The trail is already baked into the video, so this example cannot test accuracy on your footage or toggle a clean original.
Put this into practice: Inspect Shot 04 in the interactive Shot Tracer demo.
FRAMES FROM THE PREPARED DEMO REEL
Follow the ball into the rim area
Two frames from Shot 04, at 18.20 and 18.60 seconds in the sample reel. The gold trail is part of the existing video. Enlarge the images to inspect the ball and rim, then replay the sequence to check movement between frames.
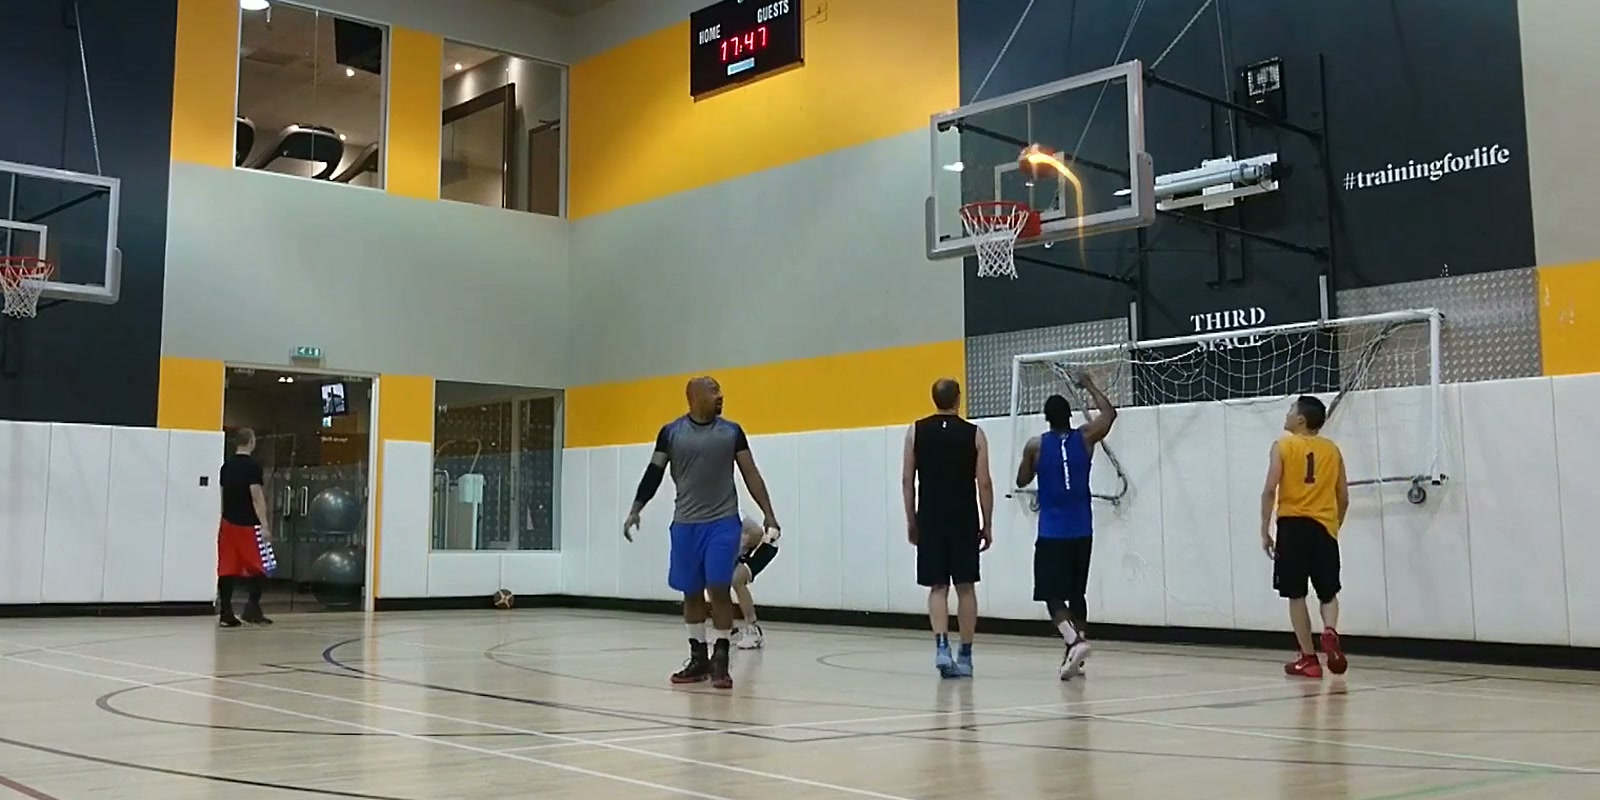
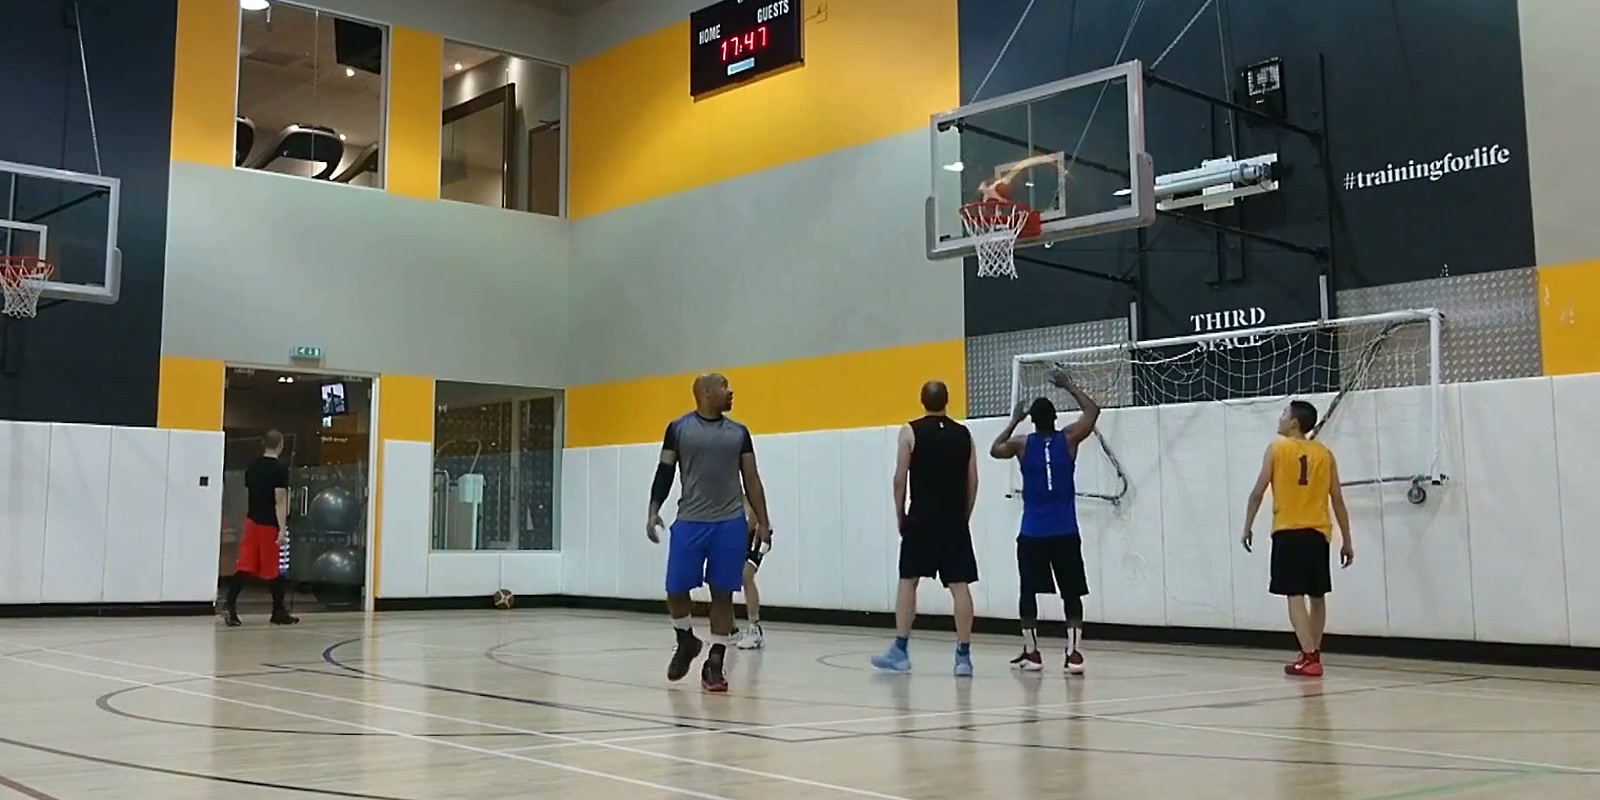
Replay the prepared basketball Shot Tracer sample · Select an image to see it full size.
Resolve visibility problems before adding more effects
If a defender hides the ball for most of its flight, use a clearer possession rather than treating the overlay as evidence of the missing motion. If a crop cuts the top of the arc, return to the wider source. If the trail blends into the court or covers the rim, reduce its visual weight or adjust the treatment only where your editor offers those controls. When a result cannot be corrected, leave the clip clean. The troubleshooting table below gives a useful next action for each case.
Choose the effect for the audience
A social highlight can use the trail to draw attention to a shot. An evaluation video may be more useful with the original possession and no effect. Do not use the graphic as proof of shot accuracy, distance, scoring or a measured shooting percentage. For a sequence with multiple attempts, choose the clearest shots and use a consistent treatment. Compare the result at normal speed, not just in a paused frame that hides a jump between frames.
Put this into practice: Plan a basketball recruiting video with clean supporting footage.
Check the exported trail on a phone
Export a short test before treating every clip. Open the actual file and check the ball, rim and line at the viewing size. Look for a trail that appears before the ball is identifiable, continues after the useful motion or becomes hard to see after compression. Keep the camera framing that supports the whole action. Save the clean original and the effect version with distinguishable filenames so a later coaching or family edit can use the right one.
Put this into practice: Prepare the full highlight sequence from game footage.
Next steps for your basketball footage
Before you export
- The original attempt and the visible ball are available for comparison.
- The ball and rim stay in frame throughout the useful action.
- The trail has been checked at release, during flight and at the finish.
- A short exported sample has been reviewed at normal speed on a phone.
- A clean copy is kept when the audience needs to evaluate the possession.
Basketball trail troubleshooting: choose the next action
| Problem you can see | What to do next |
|---|---|
| The ball disappears behind a player | Review the original around the obstruction. Use a clearer shot if the flight cannot be verified. |
| The arc reaches outside the crop | Return to the wider source or reframe. Do not invent the missing part of the shot. |
| The line covers the rim or blends into the background | Adjust the treatment if supported, preview on the target device, or keep the clean clip. |
| The trail jumps to a different object | Check the source frame by frame. Correct it only with controls your editor actually provides; otherwise omit the effect. |
| The result looks fine paused but wrong in motion | Replay the export at normal speed and inspect the transitions between frames, not only the three checkpoints. |
Practical questions
Is this basketball Shot Tracer or a golf tracer tutorial?
This guide is for basketball footage: a visible shooter, ball, hoop and complete attempt. The verification steps concern the flight toward a basketball rim.
Can the website add a tracer to my uploaded video?
The browser demo reviews a prepared reel and does not process uploaded games. Hoopcut’s iPhone app provides the basketball Shot Tracer feature. The sample is not a recording of the app’s editing controls.
Can I turn the trail off in the sample?
No. It is already part of the prepared video. To compare your own clean and effect versions, retain the original source before applying an overlay.
Should I add the effect to a recruiting video?
Follow the recipient’s instructions. Keep clean, complete possessions for evaluation. A trajectory graphic is a presentation choice and is not a scoring or accuracy measurement.
Sources and further reading
Editorial guide by Hoopcut at SWINK AI INC. Prepared examples and illustrations are labeled. External product information is not a claim of hands-on comparative testing. Send a correction or a workflow question.