Filming basketball
How to Film Basketball Games: Position, Framing & a Test Run
Learn where to place a basketball camera, what to keep in frame, and how to test your recording before tipoff. Includes a court diagram and clip log.
 THE HOOPCUT PLAYBOOK
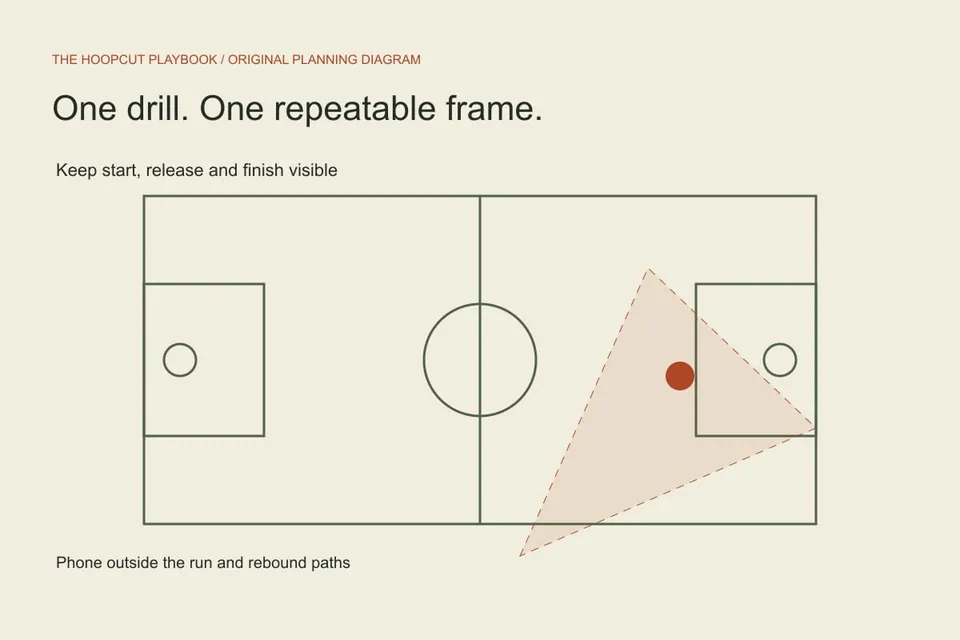
The best place to start filming a basketball game is an approved, stable position near midcourt with a clear view above spectators. From there, decide whether your camera will hold a full-court view or follow the possession. This guide is about capturing usable source footage; the highlight-editing guide covers what happens after the game. The court diagrams are proposed setups, not measurements from a particular gym.
A PRACTICAL STARTING POINT
Choose a midcourt position before you choose a zoom level
Walk to the filming area before warmups finish.
Pick a full-court view or a controlled follow shot
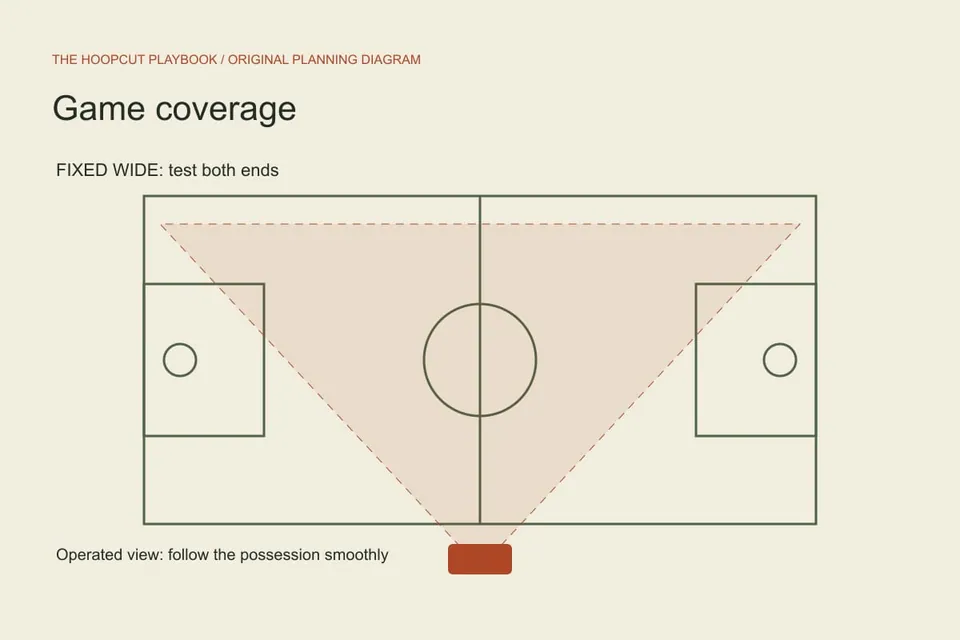
An unattended fixed camera needs enough width to retain the relevant action at both ends.
Test the corners as well as the basket
Ask a teammate to move through the near corner, far corner and lane before the game, where permitted.
Choose a midcourt position before you choose a zoom level
Walk to the filming area before warmups finish. Look toward both baskets and check whether people standing in the rows ahead will block the near sideline. A central position reduces the difference between the near and far ends. Synergy Sports also recommends a position near half-court. Ask the venue which locations and mounts are allowed; a diagram cannot establish access to a real gym. Do not place a stand where it interferes with spectators, players or staff. A permitted, clear seat is more useful than an ideal angle you cannot keep.
Pick a full-court view or a controlled follow shot
An unattended fixed camera needs enough width to retain the relevant action at both ends. Review a short recording on the actual phone: if jersey numbers are too small to identify, widening further will not solve that problem. A person operating the camera can follow the active half while retaining the ball handler, basket and nearby teammates. Move smoothly with the possession instead of chasing each pass. Avoid repeated zoom changes that make the sequence hard to watch. Our diagram contrasts these coverage choices; it does not promise automated camera tracking.
Test the corners as well as the basket
Ask a teammate to move through the near corner, far corner and lane before the game, where permitted. Record rather than judging only from the live preview. Play back the result to check whether the ball, feet and hoop remain visible. Leave space ahead of movement. If a spectator crosses the image during this test, consider whether a small approved change in position solves the obstruction. Keep enough context before a shot to show how the player received the ball, especially if you intend to review decisions later.
Make a short device check using the settings you will keep
Apple documents resolution and frame-rate choices in the iPhone Camera app; available options depend on the model. Choose a setting your phone can sustain for the session, then test it in that gym. Inspect motion, brightness and the saved file rather than assuming the highest setting is always the useful one. Check free space and power before recording a long game. This page does not prescribe a universal shutter speed or claim to cure gym-light flicker. If you see a problem, test changes before tipoff and keep the version that plays back clearly.
Log source time rather than guessing from the scoreboard
The game clock and the recording clock measure different things. A timeout may stop one while the other continues. Write a source filename and elapsed video time in the clip log, then add the period or game clock as a separate note. If you pause recording between periods, give the next file a distinct name. A useful entry identifies the player, what happened and where the clip begins. Mark uncertainty for later review instead of entering a made-up timestamp that another editor cannot locate.
Keep the original before you make highlights
After the game, confirm that each file opens and contains the expected period. Keep an original copy before trimming or replacing anything. Review a few candidate possessions with the clip log and use a separate shortlist for the final edit. Hoopcut can help with basketball auto clipping and Shot Tracer; it does not fix missing source action or operate your camera. For the editing stage, follow the linked highlight workflow and review the prepared clipping demo. Keep the capture decision and the editing decision separate so a short social reel does not become your only record of the game.
Next steps for your basketball footage
ILLUSTRATED WALKTHROUGH · 9 SECONDS
See the planning approach
Read the walkthrough transcript
- Choose a midcourt position before you choose a zoom level
- Pick a full-court view or a controlled follow shot
- Test the corners as well as the basket
Before you begin
- Confirm an approved location with a clear view of both ends.
- Record and replay a near-corner and far-corner test.
- Check power, available storage and the first saved file.
- Label source files and keep elapsed video time in the log.
Two recording approaches
| Check | What to look for |
|---|---|
| Fixed wide view | Use when no operator can follow play. Test that the relevant action stays visible. |
| Operated follow shot | Keep the active possession readable with slow movement and enough surrounding context. |
| Source review | Watch a saved test, not only the camera preview. |
Practical questions
Should I film a basketball game vertically?
For a whole-game record, a horizontal view is a practical starting point because the action spreads across the court. A dedicated vertical social shot serves a different purpose. Test the intended framing before relying on it.
Can an app recover a basket that was outside the frame?
The original view limits what can be shown. Do not plan on an editing effect restoring action that was never recorded.
Sources and further reading
- Hoopcut product overview
- Synergy Sports: Camera instructions for filming games
- Apple: Record a video with iPhone
Editorial guide by Hoopcut at SWINK AI INC. Prepared examples and illustrations are labeled. External product information is not a claim of hands-on comparative testing. Send a correction or a workflow question.